 by
by Recently stepped into the influencing world? Embracing the new journey of being a food blogger or already a professional in food photography?
Taking a decadent picture of delicious dishes, colored ingredients, or juicy treats aligning the clarity, exposure, and realistic aspect: Now, how hard can it be? A professional, not so much, a beginner a little.
So we have made a list of secret hacks and tips that can help you with capturing the authenticity of the food subject. This article covered a few significantly rare and effective techniques and tricks that will add glamor to your beautiful food photography, enough to keep a heavy audience attracted to them.
These tips can not only enhance your skill and picture quality but also provide you with a sigh of convenience during consistent food shots.
So, if you are ready, let’s dig into and explore the world of food photography like the ultimate pro.
This Post Contains
What is food photography, and how is it different?
As stated by the name, Food photography is basically the photos taken of food, recipes, or ingredients at any dining hotel. With the means to market or promote their services, restaurants, and chefs preferably hire professionals to take the deliciously sharp and clear shot of their food.
Unlike the other macro subject, this food photography needs precise details, a specific time frame, a right angle, and aesthetic arrangement to keep it centered, looking fresh and tasty.
There are a few categories of food photography that you should know off before tuning into the tips and tricky parts.
- Product or dish pictures are taken to indulge in the menu card, banner, or packaging. These are significantly high-quality images.
- Advertisement products or dish pictures tend to be more creative and professional, enough to catch immense attention and inspire people to buy.
- Recipe pictures that include the meal, the ingredient, and recipe shots are intended to provide informative insight to the audience.
- Food blogging requires the basic yet quality imagery of food to be posted on social media platforms with information, promotion, or inspirational aspects.
- Documentary of food shows the making of dishes, or live food in action, including people serving, cooking, or eating. It’s more of the telling-the-story format.
Exclusive tips to make you better at food photography
Food Photography isn’t complicated at all; styling the food and capturing its mouthwatering beauty in the frame can possibly become easiest with some simple trick. This guide-come-tip is divided into three sections.
Pre-Production
Before just jumping to shooting the subject, it is essentially prescribed to take a step back and do the planning. Better planning always results in a better outcome.
Planning– Make a mental note about the shooting, the location, the timing, and the theme. Keep your equipment ready (like battery charged) and test them once before the shoot.
Some of the essential tools and gatherings you need to focus on for food photography are
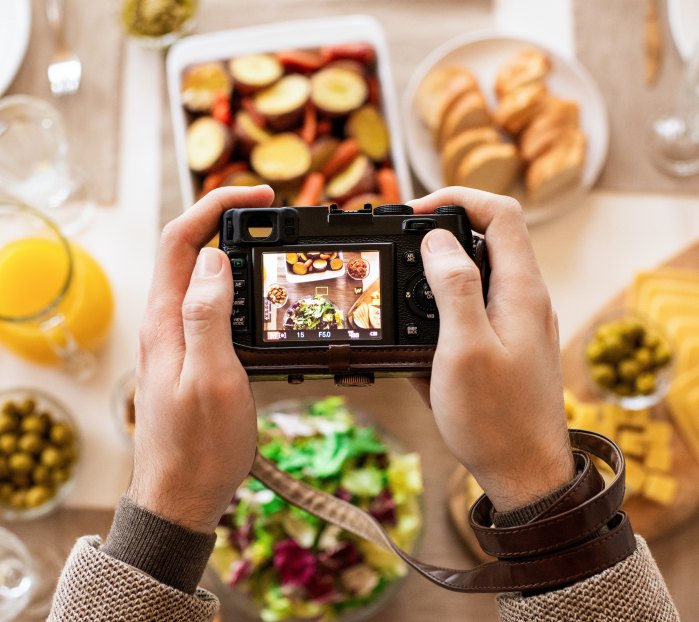
- Camera– Let’s break the bias that you will need a fancy expensive camera to shoot an impressive food shot. Regular DSLR or even point-and-shoot cameras can work through it until it allows manual mode.
- Lens– For shooting food, you are obviously going to need a macro lens with the least focal length for the closed details, but one more thing, you have to get a prime lens with a fixed focal length and no ability to zoom in or out.
- Artificial light– Always be ready for the worst; try to shoot food with the maximum natural light possible, but be ready with a light ring or other power sources to keep the clarity in the image.
- Reflector– For the balanced lighting in the frame, you might have to buy a convenient reflector or whiteboard to work with the reflecting of light, and it bounces to the main subject or food, I must say.
- Diffuser– You will need the diffuser if you desire the scattered and fine share of lighting across the subject. It can fit on the flash of your camera, so when you use flash, it will automatically scatter the flow.
- Tripod– Yes, a stabilization tool would be perfect; Tripod or even a gimbal can work effectively In providing professionalism in the image through balanced steadiness after dealing with the camera shakiness.
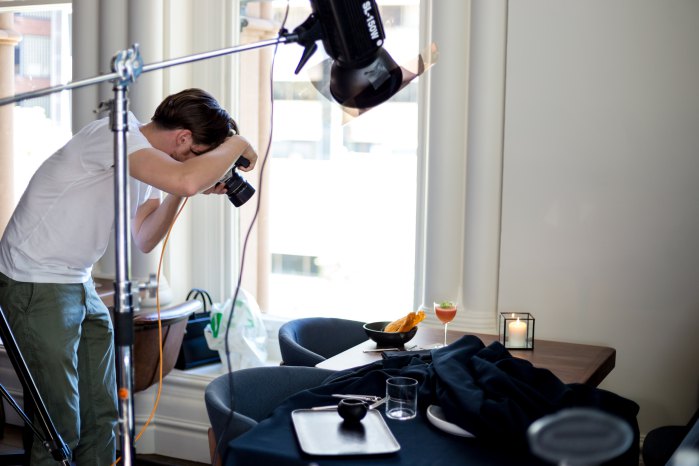
Production
Once you have gathered all the necessary tools and basics, it’s time to step into shooting food. Few things to keep in mind during shooting
Lighting– Lighting can give the strongest idea of professionalism in your photo; The sharpness, quality, and clarity rely on it. Make sure you get shot in the maximum amount of natural lighting.
- Indirect– Avoid throwing light directly on the subject, and look out for the harsh shadow in the frame; they are very distracting.
- Harsh– Do not use harsh lighting; it can include over-exposure risk; use soft and diffused light
- Side– Avoid implementing light from the front or the top; you can experiment with brightening from the side.
Experiment with angle and height– the picture shot with the same angle, again and again, is utterly ordinary and not so creative, so try to explore different angles and heights to change the shape and size of the food in the frame.
Correct color combination– The right color combination in the photographs serves together the interesting texture and serves your aesthetic. The color balancing and neutrality compliments the quality.
Focus– Always prefer using the manual focusing in food photography so that you can better control the focus. Autofocusing might get distracted by the narrow depth of field range and throw focus at the wrong destination.
Depth of Field– Depth of field is the distance that comes into focus; in food photography, the DOF is destined to be narrow, creating emphasis on the part of food, and the camera will know where to put the focus.
Lines and Layering– One of the significant steps to do while food photography is to tap into the lines and layers for the proper fill and composition. With the additional props and more objects in the frame, you need to be sure that your main food won’t get distracted, so use this to serve the image as a whole.
Negative space– Don’t put too much magnification in the image, zooming in on the subject broadly. Give the audience little space to explore the background and stuff. So use negative space in the picture to soothe the catcher’s eye.
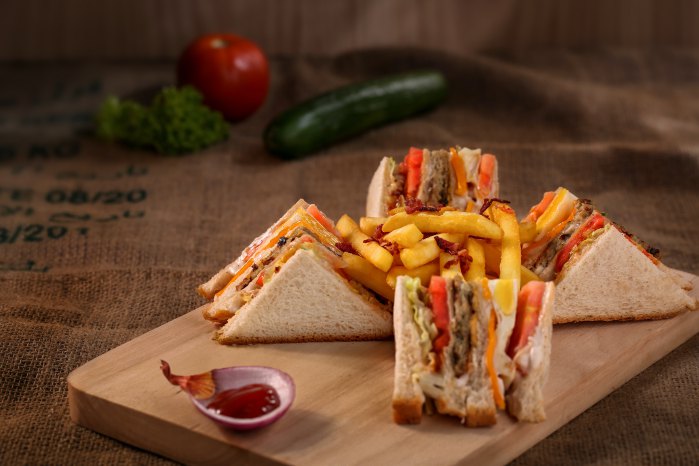
Backdrops– you cannot forget about the backdrop; when you are about to take a perfectly balanced shot, make sure the food is different from the background, so use a backdrop between something like a wooden plate or dark stand.
Additional prop– Do you know what can make your shot perfectly artistic? Additional prop. The involvement of fake elements on the table along with the subject takes your food photography skill to the utmost level making it amusingly appealing.
Steam creativity– The significantly crucial thing to keep in mind is to not shoot the food image after getting cold; try to capture the hot sizzling food along with its steam rising from the dish; that just makes it more fascinating.
Aperture and shutter speed balance– You need to keep the pace between aperture and shutter speed; the aperture (amount of light) and shutter speed (duration for shutter opening to let light in); this will create an illuminated, crisp, and soft image. Keep the aperture mid-range and slow shutter speed in this case.
Human interaction– You can add a human in your frame while shooting for creativity’s sake and stealing the audience’s attention. This may include cooking, eating, or simply behind-the-scenes shots.
Clutter elimination– If you notice too much stuff creating a heavily engaged background to your photo, remove these clutters that don’t add in so it would keep the audience from getting distracted.
Practice and Practice– You can always conquer the food photography genre by practicing a lot. Keep these significant tips and hacks in mind and go on practicing constantly; you will eventually see the result.
Post Production
After the raw shot, polish the result with a sharp and finest finishing with the post-production editing.
Sharpening – After the shooting, you can always increase the sharpness of the images through paid software editing. Edging over more details and quality
White balance– Sometimes, you will see a random white stain in your frame, which might be the result of a disbalance of white balance. This can be fixed by editing.
Brightness– Check for the stability, balance, and equivalent brightness in the image; If the brightness is low, try increasing contrast, and if the brightness is high, try decreasing it.
Saturation– Enhance the saturation level in your shot food images and manage the intensity of the subject’s texture, which gives a professionally attractive impression.
Unnecessary Stain– if you see any other stain in the images, you can fix it in the photo editing software, making it perfectly served.
Summing up
Checking Instagram’s beautifully shot delicious food pictures and feeling a little envious at the corner of your heart days are over now; we have opened you the door of the opportunity to shoot creative and professional photography by lending some rough guidelines.
The guidelines include experimenting with different lighting techniques, trying new angles, embracing the competency of filters, or engaging with the right composition.
We have added the complimentary by telling you the secrets and rarest tips of including additional prop; a unique approach giving your picture a subtle edge and distinctive perspective to catch the viewer edition.
Food photography is not rocket science, it’s the easiest and most creative art, so little attention to detail, artistic experiment, and practice will do the work and create deliciously awesome footage. Try it now