 by
by Good lighting is the heart of a sharp image or video; it’s the key to over-the-top level professional photography; it can make your footage worth or ruin in deficiency.
If you are deeply into the photography game, you must have confronted the fact that ISO is considered one of three pillars that stands for maintaining the exposure in an image. In terms of photography, the ISO plays the major card in managing the brightness level in the image.
Now behind every sharp and luminant picture, there is always the hardest work done by the ISO, but how? How do they affect picture sharpness? How do they work? And how to effectively use them?
In the end, this article will answer all of these questions and even more, which will give you a hand in producing the best possible result. Let’s dig in
This Post Contains
Understand the ISO in the photography
In technical terms, ISO refers to the camera’s sensitivity to the light; in simple words, ISO is one of the essential pillars in the exposure triangle, the element giving hands in managing the brightness of the image.
Increasing the ISO states the higher amount of light on the frame, and the decreasing of ISO signifies reducing the amount of lighting in the frame, eventually turning the image bright or dark.
Name– ISO is referred to as the “international organization for Standardization” the whole purpose of the ISO is to serve well sensitivity to the camera sensor, the more diplomatic means the brightest image. It doesn’t seem responsible for the amount of light coming to the frame; it just collects the information and tells your camera how much light the signal is hitting the sensor.
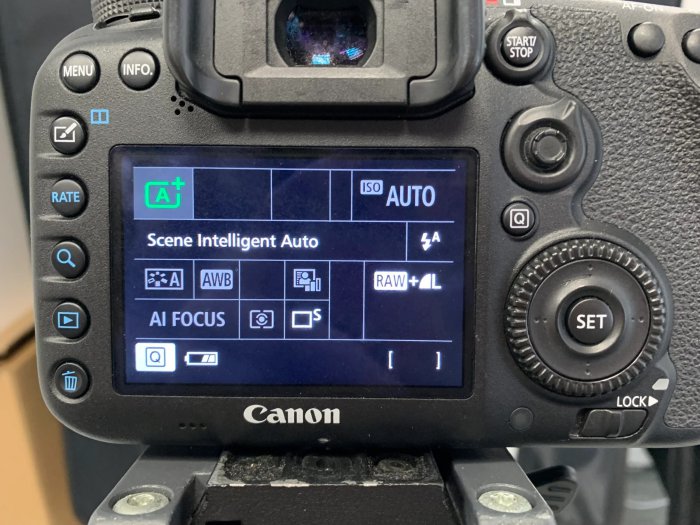
Location– The ISO can be found on your camera under the setting menu with a highlight commonly named ISO word on it. The ISO written button is followed by the ranging number from ISO 100 to whatever the camera is offering.
How does it work in photography?
The objective of the ISO is to evaluate the sensor sensitivity to the light and increase the value to result better with additional lighting or reduction of lighting in the frame according to the need. This all follows up in an ethnic step.
- First, the camera sensor collects the amount of light coming from the opening of the aperture.
- The time of opening the shutter for the light gathering to the shutting (shutter speed) is noted.
- Once the light is received, ISO comes into action by making an interpretation of it (amplification of light). If needed for low sensitivity
- When the values show the highest sensitivity, the ISO participates by reducing the light to avoid wash-off details from the frame.
- Once the ISO has done its part, the image will glow brightly or become darker according to the alteration.
How does making changes to ISO will affect the picture quality
Well, a lot can happen when you manipulate the ISO setting from changing one value to another. A higher ISO setting will push the sensor to higher sensitivity, making room for more light and the brightest image. The lower ISO Settings will bring down unnecessary lighting in any frame, clearly ensuring the wash-up details are alive.
There are a few things that can be counted in the ISO importance box
- They are held responsible for the good image quality
- They will be held steady to balance the light amount in the image
- They needed to be present to avoid noise or wash-off details in the frame due to heavy brightness.
- They have the responsibility for bringing edge-to-edge illumination in the dark hour shots.
- They can rely on image sharpness and clarity.
How does the ISO get measured?
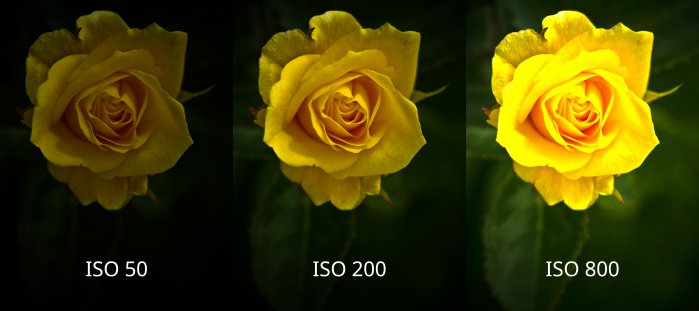
ISO, the sensitivity to light, is measured in regular numbers; well, technically not regulars; they are multiples of 100, at least they used to. The common ISO numbers are ISO 100, ISO 600, and ISO 800. However, with the modern revolution in photography, specifically in the ISO field, determined that ISO now can be measured in general numbers like ISO 320, ISO 6400, etc.
The ISO, however, measured the same, the lowest value meaning the less sensitive to light while the highest value means maximum. The ISO level (decreasing to increasing order of sensitivity) standardly in digital cameras are
- ISO 50
- ISO 100
- ISO 200
- ISO 400
- ISO 800
- ISO 1600
- ISO 3200
- ISO 6400
Here ISO 50 is the least sensitive to light while ISO 6400 is the highest sensitive to light.
ISO Evaluation
In terms of photography, ISO relates to the sensor sensitivity to the lights; it collects the info and is expressed through the ISO range. The lower ISO number makes the sensor a little sensitive to the light, and it requires more lighting to expose the precise details and clarity. While the high ISO articulates that the sensor is more sensitive to light, that grants you the freedom to shoot in a darker environment. Some of the common ISO values that can be used within different lighting-required scenarios are
- ISO 100 to ISO 200 = Bright Daylight outdoor shot
- ISO 200 to ISO 400 – Indoor but bright shot
- ISO 400 to ISO 800 – Indoor shot with flash
- ISO 800 to ISO 1600 – Indoor dark scenario shot
- ISO 1600 to ISO 3200 – Indoor Night hour shot
- ISO 3200 and above – Outdoor lowest light shot.
What’s the correlation between ISO and Noise?
Well, ISO is responsible for managing the brightness level; it is highly situational; Increasing the ISO level can brighten up the darkest frame. But remember, without the proper insight of Setting ISO value, you might face the trouble of distortion.
Increasing ISO or putting extra light in the photo can allow too much noise in the image, ruining the whole frame’s details and quality.
ISO has a direct relation to the noise level. The lower ISO value is potent to include a minimal amount of noise, while the high ISO range has the risk of including too much noise in the frame, destroying quality. The same goes for the dynamic range.
How to use the ISO for better pictures
The ISO is formed in such a way that it can be modified accordingly to balance the amount of light in the image. Two of the major settings of ISO that can be implemented as the final setting to bring out the best results are.
High-ISO usage– Using the High-ISO value usually refers to the low light condition where you need to brighten up the frame a little. One of the most common cases is during the shooting of the Milky Way, which is equally challenging. Using too much high ISO will get you open with the risk of overexposing the photo. In this ISO range, the risk of noise is higher, but you can easily click the fastest motion image with a higher shutter speed.
Low-ISO usage– Low-ISO range can be used for the brightest picture, like a daylight shot. Where you need to balance the scenario with enough light. This can be achieved by Setting the native ISO to the lowest. Native ISO is usually ISO 100, but you have to set the low ISO so tune in to ISO 200 or ISO 400. In low ISO usage, the chances of noise reduction are minimal, but capturing moving objects with the fastest shutter speed will be difficult.
Some essential tips for using ISO for better photography
Wrapping up the details of ISO, you must have an idea of how crucially important it is to shoot a better-quality image. So here are a few quick tips for using ISO for better results.
- Always know what ISO value to choose for better results; know the ideal ISO range, lighting availability, and photography style evaluation.
- You can also set your camera to auto ISO and analyze the result; if the outcome shot is satisfyingly clear and sharp no need to manually hassle the ISO range changing.
- Another important tip is to use ISO wisely and only when required; there is no need to increase or decrease ISO value with a balanced exposure shot.
- Try to shoot with your camera’s “Native ISO.” The native ISO lies at ISO 100 or ISO 200, but they are synonymous with guaranteed sharpness in the image.
- For a more detailed picture, switch to the low ISO range, while to get precious fast-action sports shots, tap into the Highest ISO range.
- Sometimes while shooting dark hours, you can just let the ISO range low but add some artificial lighting, slow down the shutter speed, add the stabilizer, and explore the creativity.
Final word
So that’s it, that is the deep insight of the camera’s most crucial component. This is how ISO manages the sharpness and quality of images; it handles the amount of light falling onto the subject or the scenario and plays the master card in balancing the exposure level.
Until now, you might already have concluded how a good ISO can enhance your photography skill, while a bad one can leave an amateur impression.
But we hope not; now that you know every A to Z of the ISO, you will be able to practice and conquer it comfortably. Once you get hold of the ISO, there is nothing that can come in your way of exploring professional-looking shots. So, hurry up; let’s get started with more practice.