 by
by Macro photography is a distinctively unique and creative version of trapping precise details in the camera; these are all about shooting exceptionally close-up subjects.
This makes it highly creative but complicated to shoot as well. You don’t have to take brief courses on how to shoot macro; a few hacks and tips can do the trick.
The art form of Macro photography is a broad genre that doesn’t require heavy advanced equipment; it’s as easy as clicking a button; but to assure the ethnicity of clarity, focusing, and magnification, you might learn a little to light and compose the most magnificent macro shot.
The minimal but effective gear, easiest tips, lighting, and composition hack all of these precise details get covered in this article.
So, grab your DSLR, Point-and-shoot, or any shooting equipment, and let the magic of shooting life-size closed-up pictures begin.
This Post Contains
The Individuality of Macro Photography
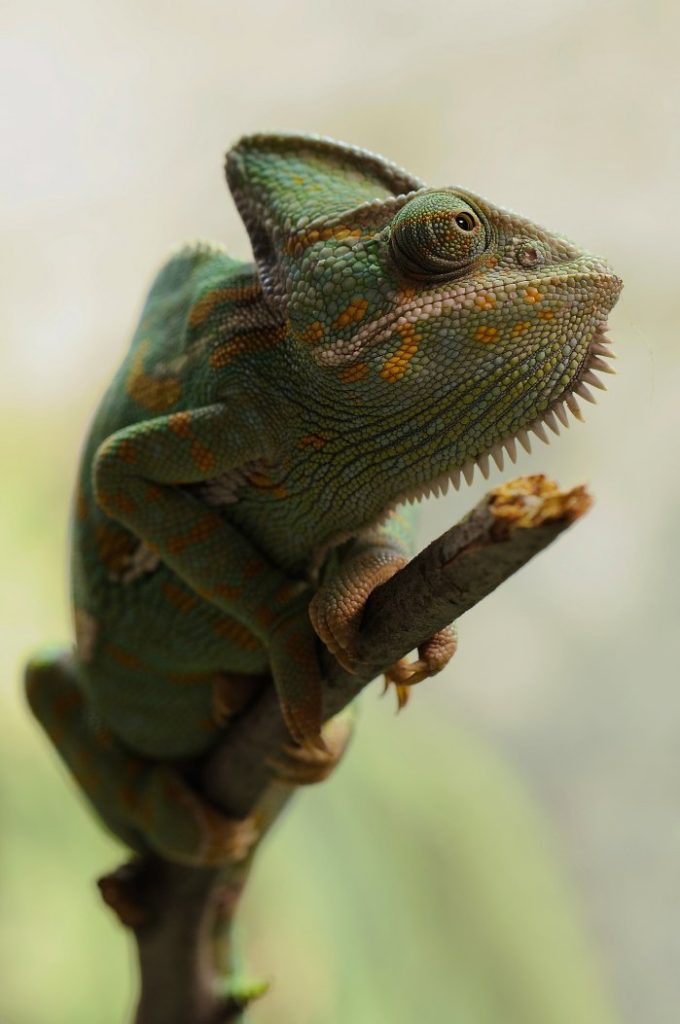
In the simplest definition- Macro photography is a genre where professionals shoot the closed-range subject at the highest magnification. It’s also referred to as Micro or closed-range photography.
With the engagement of the finest tool like a macro lens, these close-up photos are formed by aligning the precise details and sharpness. It creates a real-life image that is the same size as a real-life scenario, shot at 1:1 magnification.
Working distance– It’s the distance between your lens and the foreground subject. This ideally needs to be small for the greatest magnification. This is the main reason why a telephoto lens with a longer focal length is not suitable for macro photography.
Magnification– Evaluating how to maximize your frame will be and how big or small you want your subject to appear in the camera, the sensor is the basis of macro phytophagy. This verdict can be configured by calculating the magnification ratio.
An in-depth guide for approaching better macro photography
Macro Photography is wonderfully creative but a bit tricky as well; But it’s not rocket science, so with the help of top tips, you may get hold of the most precious clear and precise shot. There are a few steps we will follow, starting with the planning.
Pre-Planning
It’s utterly beneficial and professional to pre-plan your shooting, specifically in the case of such a creative genre of photography. So, there are a few things you need to do within this whole pre-planning step.
Subject– First thing first, you need to choose what subject you will be shooting with your advanced tools. Few macros are filming types you can pick.
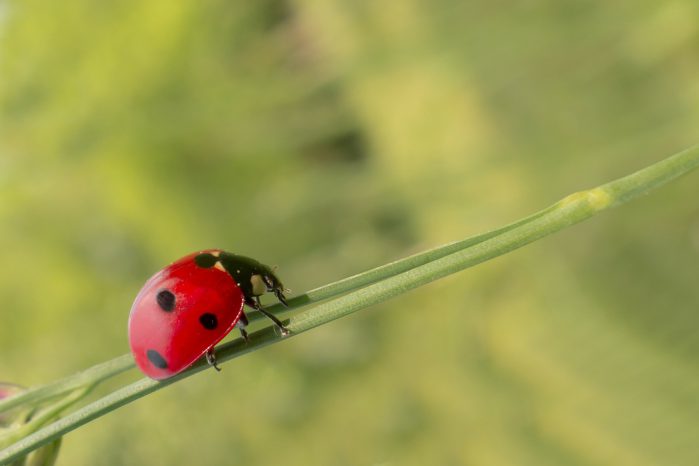
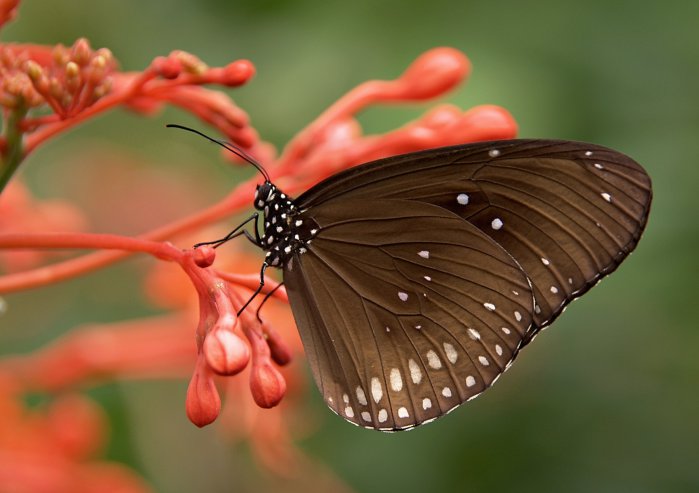
- Nature– Nature is a great scenario to be explored through the macro photography genre, the water droplets on trees, bugs, dried leaves, or any flora and fauna creatures.
- Portraits– Macro photography can always be shot in portrait form; now, you =bring any subject under the portrait’s frame, whether it’s an object or live-person elements like eyes or lips.
- Products– Any small object or product shot could satisfy the Macro photography filming expertise like jewelry, electronics, household luxury goods, and others.
- Food– Food shooting can also suit the macro photography criteria; these can be shot in fine dining hotels and by taking food, ingredients, or drinks shots.
This part can be skipped if you are a professional and already have the project. But if not, you may choose any subject, like insects, butterflies, water drops, jewelry, or household stuff.
Time– You will be going to plan the shot according to the weather, lighting, and surface area effect. So pick the adequate time for shooting.
- Midday– Flattering and super vibrant to shoot
- Morning– The golden hours with magnificent lighting
- Evening– Twilight or blue hour with clear color.
Gathering Tools– Get this advanced tool before getting on the hunt for the best macro shots.
- Advanced camera– There is no special requirement for the expensive high-tech camera for macro photography; you can also shoot with Point-and-shoot GoPro. So, find yourself a working advanced DSLR or mirrorless camera.
- Macro lens– You will need a separate macro lens for the shooting, designed for better focus close-up and magnification. Three types of macro lenses you can choose according to their focal length Short (35mm-60mm), Intermediate (90mm-105mm), and long (150-200mm); we recommend the intermediate macro lens.
- Close-ups filter– There are a lot of macro or close-up filters available on the market; they are perfect magnifiers for your lens, and they work similarly to the standard magnifying glass works by shortening the lens focusing distance.
- Extension Tubes– You can choose either a macro lens or an extension tube; an Extension tube gives you the power to extend and shoot closed-up photos in the absence of a macro lens.
- Stabilizer– It is utterly necessary to think about stabilizing the camera, So bring any tripod or gimbal to avoid the disruption in frame caused by camera shakes or bumping throughout the shooting.
- Ring light– Lighting might be an essential tool, so don’t forget to take a simple ring light that can fit over your lens and pour enough lighting on the subject.
The Main Doing
Okay, Equipment check, Location check, shooting time check, now we dive into the main and significant part; The Shooting. While shooting Macro photos, just keep these tips in your mind.
Focusing mechanism – You can’t afford to use autofocusing in macro photography. They need immense attention on the subject, and their depth of field turns to the lowest, which might disturb the AF performance. So go for the manual focus.
Working Distance – Always keep your working distance to the lowest; Working distance is the distance from focal length to the subject. For a better-closed vision of the subject, keep the distance minimal.
Depth of field– Choosing depth of field is the wisely important thing to do during the shot. Macro photography means narrow DOF; this is because it requires a narrow focus on the subject and slight blurring of the back, which can only be achieved by the narrow depth of field.
Shutter Speed– You will need to set a lower shutter speed than regular with macro shooting; because they require extra time to be open and process the well-exposed image. Also, the slow shutter speed means no motion capturing, which sounds like Macro shooting.
Background– You can experiment with creativity with the background and choose a natural environment or artificial background to bring an ultimate background effect to your frame. You can exact or Opposite match the color of the foreground subject and background.
Moving subject– One crucial thing to keep in mind while shooting macro is always to move your subject in case of re-framing, not the camera, to prevent disruption or jerking troubles.
Manual mode– Try to always shoot in the manual mode so that you can put the basic settings accordingly and take control of your camera and explore creativity
ISO and Aperture – If you are using a manual mode, you need to enter the ISO and aperture physically on your own. This signifies the amount of lighting that falls on your subject. The short depth of field means a wide aperture. Set accordingly.
Fine Tuning– Since you will be using manual focusing instead of auto, you might face unfair focusing in the frame at the subject because of the shallow depth of the field; So adjust the focus ring and make sure to get the fine-tuning focusing on the necessary subject.
Point of focus– Using manual focusing and a narrow depth of field makes things harder for the pro-leveled shooting, so try creating something keeping the subject exact at the focus point. This will help because you stand closest during the macro shooting, distracting the focus on the subject.
Color Exploring– Try indulging different colors in every shot; consider color in your composition. Remember to always choose a background color different from the subject. Try not to pick too bright a color to pop out the viewer’s eye or soft, dull color to pose boredom.
Stabilization– You need to ensure your camera and lenses are steady; using in-built stabilization techniques in the camera and lenses works fine, but you can also attach additional tools like a stabilizer or gimbal.
Flash magical shooting– Sometimes, you have left with the option of decreasing the aperture to get a large depth of field; in such case, you can shoot with the flash availing enough lighting in the frame flashing all the necessary details
Practice a lot– The phrase “Practice makes perfect” is implied in this situation. Remember, along with all these tips, your macro shooting can only be improved if you practice a lot measuring every precise detail.
The post-processing stuff
The final step will be bringing the finishing in the pictures; corrections, reductions, and enhancements might be needed in the post-production room. This can be done with any paid or free photo editing software.
Cropping– Trim down the unnecessary area captured in the frame and focus on the subject. So after composition, crop down if required.
Color Correction– sometimes the shot result is distorted due to the unnecessary color fringing; in such cases, you need to pour some extra attention into managing the color correction and stuff to ultimately enhance the neutrality and quality.
Exposure adjustment– Even with the ISO and aperture value manually entered before the shooting, some pictures left out exposure details, so balance that exposure from corner to corner.
Sharpness management– Make sure your photo has balanced sharpness; if not, do that with the software.
Final Word
If one can actually be on the path of being a professional photographer, one should definitely start with capturing the focused, tiniest subject; one should master macro photography.
It’s a rewarding shooting genre that enhances your skill by granting the potential to shoot the tiniest life-size imagery with closed focusing and magnification.
From including macro lenses, and extension tubes to your gear set to steps to conquer the macro filming along with the basic guide over the macro shot post-production editing, we have concluded all the essentials required to have some great macro shots.
We can only hope that this article has been helpful the way we wanted it to be, and it can kick-start your efficiency in this very genre of photography! Don’t forget to tell us in a comment.