 by
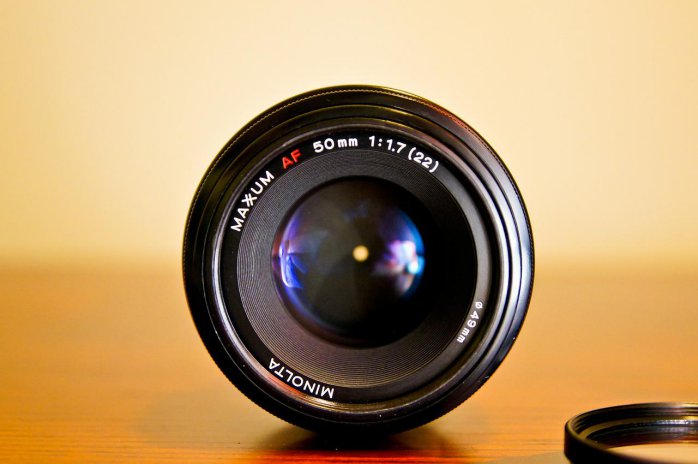
by A keen or professional photographer knows the worth of the aperture; How the aperture can change the utmost level of your photography skill, and how it can be an ultimatum to any distortion or vignetting produced in the shot.
This aperture factor can be responsible for the amount of exposure, illumination, and depth of field that falls on your frame.
Understanding the aperture might be essential in the way of training yourself for out-of-ordinary professionals, but choosing the right aperture still secures the first place in getting the most impeccable result.
So, we decided to come up with a detailed article explaining how you can move towards a sharper shot by choosing the best aperture. This aims when you can use large and when small apertures to achieve a desirable result.
This Post Contains
What exactly is Aperture in photography?
Aperture is one of the three fundamental camera settings that holds accountability for providing uniformly balanced exposure. It’s the essential element that ensures the amount of light entering the in-camera lens falls straight to the image, a mechanism that controls the light.
The aperture amount can be straightforwardly measured via F-stop or F-number; this same can be adjusted to control the amount of lighting that can enter when needed. One other point to always keep in mind is
The smaller the F-stop number will be, the wider the aperture we get.
This means the requirement of bright light in the frame will be fulfilled with a wide aperture (smallest F-stop), and the Low lighting can be done with a shallow aperture (Higher F-stop)
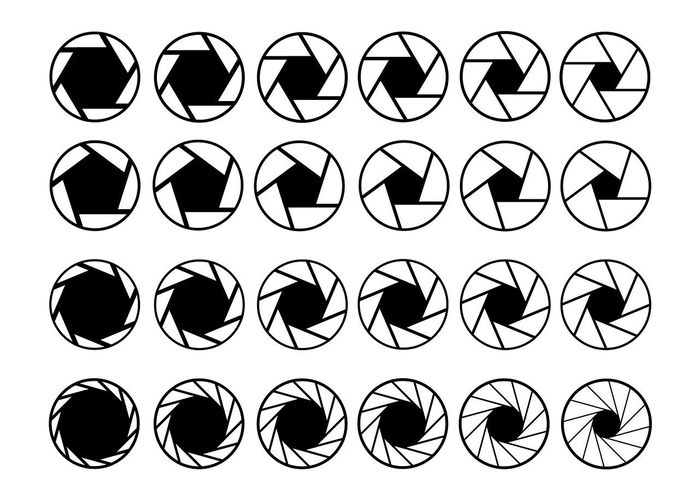
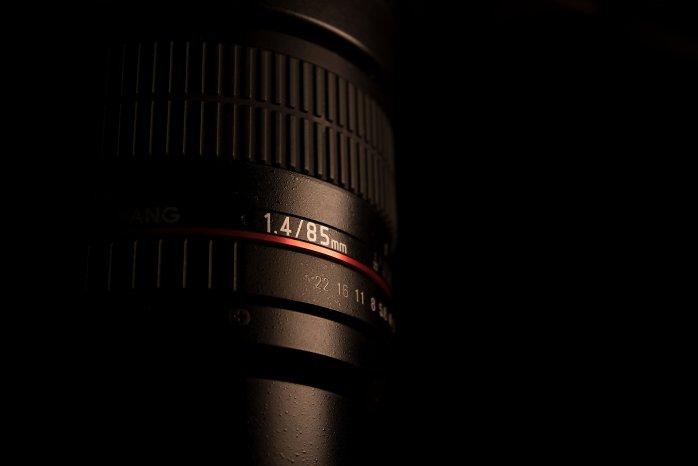
Examples of Regular basis aperture are F/1.4, F/4, F/5.6, and F/22.
Stating to the easiest fact, the aperture diameter in the lens opens as per need, and the wider opening represents the maximum amount of light entering the camera, and the maximum lighting means better creativity in the shot.
Sometimes not with the brightest natural lighted scenario. Mentioning the creative word in the frame, let’s study the aperture’s creative abilities for filming.
What are the creative effects of counting the right aperture?
Studying about the aperture here, you must get a pretty clear idea of how aperture is an absolute game-changer; its creative abilities are way beyond expressing professionalism in every shot only if chosen ideal range according to the photography style or surroundings.
So, other than the managing balance of light in individual shots, let’s see what other creative competencies of aperture we can experience if we choose the right aperture for our shoot.
- Tackling Low light scene shooting- Low light shooting might be the hardest part of filming; artificial lighting, like a flash, can throw a bad impact. The largest aperture (smallest F-stop) has the potential to embrace corner-to-corner illumination without any flash interference.
- Taping High-speed action- Sometimes, high-action shots or spontaneously dynamic shots leave out the major details. The right choice of aperture is good enough to shoot the highest-speed action footage with the largest aperture that bounds to provide the fastest shutter speed freezing the moment.
- Better hands-on depth of field- The right aperture range can let you have a better depth of field experience. DOF and aperture are vividly interrelated. When we go with the largest aperture it represents the shallow depth of field (less area in focus), and the broad depth of field usually has a smaller aperture (keeping extra details in focus). So the right aperture objectifies the right DOF.
- Eliminating distortion and soft edges- Choosing the right aperture for shooting benefits the photographer with less distortion, diffraction, and aberration fact. Also, the ideal aperture deals with the soft edges, corner vignetting, and lens aberration trouble managing the quality of the picture.
- Easy modification of artistic over indoor and outdoor filming- some of the lenses do have variable apertures, which grant permission to show expertise in both indoor and outdoor filming. Briefly, the lowest F-stop (widest aperture) handles dark indoor filming, while the highest F-stop (Narrow aperture) does well with a clear, bright outdoor shots.
How to choose “The Best” aperture for shooting?
Knowing the worth of the aperture, we all face the confusion of locating the aperture on the camera lens and what aperture size to pluck to balance the illumination in imagery.
Choosing the right aperture may vary differently on purpose; some people go on with the in-general Rule of Thumb while choosing the aperture for a photo.
The rule of thumb states that you choose the aperture based on the number of subjects in the photo, but this sometimes ignores the essential technical criteria.
So, we have followed scaling the crucial requirement of the fundamental element of shooting and then figuring out what’s best aperture range.
Ideal Aperture range = Requirement (Depth of field + Shutter speed + Focal length)
Now before moving forwards, let’s take a quick peek at these elements’ verdicts.
Wide Aperture = Shallow DOF = Fast shutter speed = Longest Focal length = (F/1.4, f/2.8 and F/4)
Narrow Aperture = Greatest DOF = Slow Shutter Speed = Shortest Focal length= (F/8, F/11 and F/22)
Choosing Aperture through technical rules
Choosing the right aperture is the ultimate key to framing flawlessly clear and pro-leveled shots. Here are some vividly popular aperture range scales and their ideal shooting options.
Wide Aperture – The wide aperture (F/1.4) usually specifies a heavy amount of lighting, which requires shooting under extremely dark scenarios (Night shooting).
Mid-Wide Aperture– The Mid-Wide aperture (F/2.8 – F/5.6) is wide enough with a better hold of lighting for lesser dark evening time shooting (Indoor shooting).
Mid-Aperture – The Mid aperture (F/5.6 – F/11) comes within a neutral range; it is basically used for all sorts of the category with the moderate requirement of lighting (Every day shooting)
Mid-Narrow Aperture– The mid-narrow aperture ( F/11 – F/18) gives you the best in providing balance too little or uniformly illuminated surroundings; they are basically used for sharpness ( Sunrise or sunset shooting)
Narrow Aperture– The Narrow Aperture( F/18-F/32) is for expressing image quality in the already illuminated image or for images with bright light for creativity only( outdoor shooting).
Choosing Aperture through different photography styles
Different photography styles usually include different scenarios with different light controls. So obviously, every individual category of photography requires a distinct set of apertures. Let’s study some of the popular shooting styles and the aperture range they use along for better results.
Portraits– Portrait shots are the easiest; they sometimes need subject details or sometimes need surroundings. They go with the selecting mid-range aperture value for managing both. Portraits usually have the narrow or lowest depth of field, which states the highest aperture. Thus a mid-level range of F/4 will be best suited for these shots.
Landscapes– Landscape means the wide beauty taped inside the frame, most likely everything in focus, everything sharp. The exact result can be achieved by maintaining the greatest depth of field for vast sharpness, and the aperture can be from the mid to smallest range. So, the best aperture figure to try on for landscape is to initiate with F/11 to F/22.
Bokeh shot– Shooting Bokeh can be really tricky; bokeh usually justifies whole blur imagery with bright lighting to pop up the background details that require special treatment. This situation needs the lowest depth of field and highest aperture range. So you can experiment with this kind of bokeh shooting, ideally with an F/1.4 aperture.
Macro photography– This Macro photography is all about capturing the finest details in the camera. So it’s clear they require the slowest shutter speed and the depth of field at the smallest. This justifies the lowest aperture range as the best option for macro imagery; something f/11 can do the best job.
Wildlife photography– Wildlife photography is the creative shot of animals and birds from a long distance. They are usually shot by longer focal lengths, and a longer focal length equals a shallower depth of field, which states a wider aperture. And wildlife shots also need the fastest shutter speed, which can be obtained from the widest aperture, so it’s best to go with F/2.8 or F/4.
Sports Photography – It’s more likely another variant of wildlife photography, where you have to catch fast-moving action subjects in a broad field of view from the longest distance. This all points towards the wider aperture (fastest shutter speed and low depth of field). F/4 is best to go for this type of shot.
Street photography – It is one of the most neutral styles of shooting; street photography can be shot with an either lower or bigger depth of field and with either bright natural or dark lighting that grants you the freedom to try any of the aperture range from F/2.8 to F/22 accordingly the light involvement and the subject you want your focus on.
Summing up
So it becomes crystal clear how the aperture is the key component of an unrivaled sharp, illuminated, and quality image. Knowing the fact that the bigger aperture determines the maximum amount of light in the lens while the small aperture pours the lesser light helps a lot in managing the professionalism in the image.
Choosing an ideal aperture can be a hectic task that blows up your mind with confusion, but not anymore; we hope these guidelines for choosing an ideal aperture were helpful.
Enough with the theory; on your next shooting project, implement these tactics and find the relevant aperture for your camera, and indulge in the creative world of filming; Because shooting professionalism is in your hand now with an artistic choice of aperture given. Happy filming!